

Embroidery digitizing is the process of converting artwork or a logo into a digital stitch file that embroidery machines can read and stitch on fabric. The process translates visual elements such as shapes, outlines, and colors into machine instructions that control needle movement, stitch type, stitch density, and thread sequence.
In machine embroidery production, the embroidery machine cannot interpret a normal image file like JPG or PNG. The design must first be transformed into a stitch file format that contains precise stitching instructions. These instructions guide the embroidery machine on how the design should be stitched on the fabric.
What Is Embroidery Digitizing?
Embroidery digitizing converts a graphic design into a structured embroidery machine file containing stitch paths and sewing instructions. The digitizing process analyzes artwork objects, assigns stitch types, and determines stitch direction and density to reproduce the design accurately on fabric.
Key elements involved in embroidery digitizing include:
- Artwork or logo file
- Digitizing software
- Stitch mapping
- Embroidery machine instructions
- Machine-readable embroidery file
During digitizing, the design is not simply copied. Instead, the digitizer programs the embroidery machine by defining how every section of the design should be stitched.
Why Embroidery Digitizing Is Required
Embroidery digitizing is required because embroidery machines operate using stitch commands rather than standard graphic images. Without digitizing, a machine cannot convert a visual design into thread stitches.
Important attributes controlled during digitizing include:
- Stitch type: Determines how threads form the design structure
- Stitch direction: Controls thread angle and texture
- Stitch density: Defines the number of stitches in a specific area
- Needle path: Guides machine movement during stitching
- Pull compensation: Adjusts for fabric stretch and distortion
These parameters ensure the embroidered design appears clean, balanced, and consistent on the fabric.
Main Components of Embroidery Digitizing
Embroidery digitizing involves several interconnected entities that work together to create the final embroidered design.
Primary components include:
- Artwork / Logo: The original design used as the input file. It may be a logo, text, patch design, or graphic element.
- Digitizing Software: Software platforms such as Wilcom or Hatch are used to convert artwork into stitch instructions.
- Stitch File: The output file generated during digitizing. Common embroidery file formats include DST, PES, and EXP.
- Embroidery Machine: A computer-controlled sewing machine that reads the stitch file and produces the embroidery on fabric.
- Thread and Fabric: Thread creates the stitched design while the fabric serves as the embroidery surface.
Together, these elements form the complete embroidery digitizing workflow. The digitized file guides the embroidery machine step-by-step to reproduce the design accurately using thread stitches.
How Embroidery Digitizing Works
Embroidery digitizing works by converting artwork into structured stitch instructions that an embroidery machine follows during stitching. The digitizing workflow analyzes the design, assigns stitch types, defines stitch direction, and exports a machine-readable embroidery file.
The process transforms visual elements into precise machine commands such as stitch path, stitch density, and needle movement. These instructions ensure the embroidery machine reproduces the design accurately on fabric.
Step-by-Step Embroidery Digitizing Process
The embroidery digitizing process follows a structured workflow to convert artwork into a stitch file.
- Artwork Preparation: The process begins with preparing the artwork file. Designers use vector files such as AI, EPS, or high-resolution PNG because clean artwork improves digitizing accuracy.
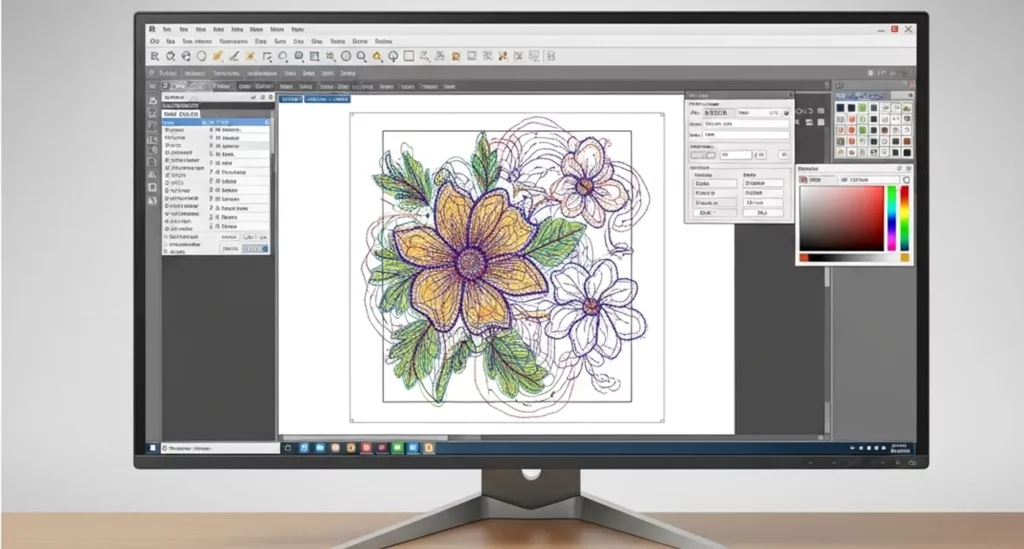
- Import Artwork into Digitizing Software: The artwork is imported into digitizing software like Wilcom, Hatch, or Pulse. The software displays the design so the digitizer can define embroidery objects.
- Object Identification and Path Planning: The digitizer separates design elements such as text, outlines, and filled areas. Each object receives a stitching sequence that determines the machine path.
- Stitch Type Assignment: Different parts of the design require different stitch structures. The digitizer assigns running stitch, satin stitch, or fill stitch depending on design size and detail.
- Underlay Stitch Creation: Underlay stitches create a foundation layer beneath the top stitches. This stabilizes the design and improves stitch quality.
- Stitch Density Adjustment: Stitch density determines how closely stitches are placed. The correct density prevents thread breakage and fabric puckering.
- Thread Color Sequencing: The digitizer defines the stitching order for thread colors. This ensures the embroidery machine changes thread colors at the correct stage.
- Export Embroidery Machine File: The final design is exported into a machine-readable embroidery format such as DST, PES, or EXP.
- Test Embroidery on Fabric: A test stitch is performed to verify stitch quality, design alignment, and thread performance.
This workflow ensures the design is properly optimized for machine embroidery production.
Key Machine Instructions Generated During Digitizing
Embroidery digitizing generates several machine instructions that control stitching behavior. These attributes determine how the embroidery machine produces the final design.
| Attribute | Function |
|---|---|
| Stitch Type | Defines stitch structure such as satin, fill, or running stitch |
| Stitch Direction | Controls the angle and texture of stitches |
| Stitch Density | Determines the number of stitches in a specific area |
| Stitch Length | Controls the distance between stitch points |
| Needle Path | Guides the movement sequence of the embroidery machine |
| Pull Compensation | Adjusts stitch width to compensate for fabric tension |
These parameters ensure the embroidered design remains balanced, readable, and structurally stable during machine production.
Types of Embroidery Digitizing
Types of embroidery digitizing are categorized based on the design structure, embroidery surface, and stitching technique used in machine embroidery. Different design types require different digitizing strategies because fabric behavior, stitch density, and machine movement vary for each application.
Each type of embroidery digitizing uses specific stitch parameters and path planning to ensure the design stitches correctly on the selected material.
Logo Digitizing
Logo digitizing converts a company logo into a machine-readable embroidery stitch file for branding and apparel decoration. This type of digitizing focuses on maintaining brand accuracy, clear lettering, and balanced stitch density.
Common applications include:
- Corporate uniforms
- Company polo shirts
- Branded jackets
- Promotional apparel
Important attributes in logo digitizing include stitch direction, letter readability, and thread color accuracy.
Patch Digitizing
Patch digitizing creates embroidery files used to produce embroidered patches that can be attached to garments or accessories. Patch designs typically include borders, dense stitching, and strong underlay structures to maintain durability.
Common patch categories include:
- Military patches
- Police patches
- Motorcycle club patches
- Custom embroidered patches
Patch digitizing often requires satin border stitching and dense fill stitches to ensure the patch holds its shape.
Cap/Hat Digitizing
Cap digitizing prepares embroidery designs specifically for hats and structured caps. Cap embroidery requires specialized digitizing because the embroidery surface is curved and smaller than flat garments.
Key considerations include:
- Center-out stitching sequence
- Reduced stitch density
- Short stitch lengths
- Correct stitch direction for curved surfaces
Cap digitizing is commonly used for:
- Baseball caps
- Snapback hats
- Promotional caps
- Sports team caps
Monogram Digitizing
Monogram digitizing focuses on converting letters or initials into decorative embroidery designs. This type of digitizing is commonly used for personalization and decorative textile products.
Typical applications include:
- Personalized clothing
- Towels
- Robes
- Gift items
Monogram digitizing requires careful stitch planning to maintain smooth letter curves and balanced stitch density.
These categories demonstrate how embroidery digitizing adapts to different embroidery applications. Each design type requires specific digitizing techniques to maintain stitch accuracy, fabric stability, and production efficiency.
Embroidery Stitch Types Used in Digitizing
Embroidery stitch types used in digitizing define how thread forms the structure of an embroidered design. During the digitizing process, the digitizer assigns specific stitch types to different design areas based on object size, shape, and detail level.
Each stitch type controls how the embroidery machine fills shapes, creates outlines, and produces text. Correct stitch selection ensures the embroidery design remains stable, readable, and visually balanced on fabric.
Running Stitch
Running stitch is the simplest stitch type used in embroidery digitizing for outlines, fine details, and connecting elements. It consists of a sequence of single stitches placed along a path.
Common uses of running stitch include:
- Design outlines
- Small detail elements
- Thin lines
- Underlay stitching
Running stitch produces minimal thread buildup, which makes it suitable for delicate or detailed embroidery sections.
Satin Stitch
Satin stitch is used in embroidery digitizing to create smooth, dense stitching for lettering and borders. This stitch type forms long parallel stitches that cover narrow shapes.
Typical applications include:
- Text and lettering
- Logo outlines
- Decorative borders
- Small filled shapes
Satin stitches create a smooth surface and strong thread coverage, which makes them ideal for clear and readable embroidery text.
Fill Stitch (Tatami Stitch)
Fill stitch, also known as tatami stitch, is used to cover large areas in an embroidery design. It consists of closely spaced rows of stitches that fill wide shapes and background sections.
Common uses include:
- Large logo elements
- Background areas
- Patch designs
- Decorative patterns
Fill stitches use controlled stitch density and directional patterns to maintain fabric stability and prevent distortion during embroidery.
These stitch types form the foundation of embroidery digitizing. By combining running stitch, satin stitch, and fill stitch, digitizers create structured embroidery designs that embroidery machines can reproduce accurately on fabric.
Embroidery Digitizing Software
Embroidery digitizing software is used to convert artwork into stitch instructions that embroidery machines can read and execute. The software allows digitizers to define stitch types, control stitch density, adjust stitch direction, and generate machine embroidery files.
Digitizing software acts as the central tool in the embroidery digitizing process because it transforms visual designs into structured embroidery data.
Professional Embroidery Digitizing Software
Professional embroidery digitizing software provides advanced tools for creating precise and production-ready embroidery designs. These programs allow digitizers to control every stitch parameter and optimize embroidery for different fabrics and machines.
Common embroidery digitizing software includes:
- Wilcom Embroidery Studio: Industry-standard software used by professional digitizers
- Hatch Embroidery Software: Popular software for both professionals and beginners
- Pulse DG Software: Commercial embroidery digitizing platform
- Tajima DG/ML by Pulse: Software designed for Tajima embroidery machines
- Brother PE-Design: Digitizing software compatible with Brother embroidery machines
These platforms provide tools for object-based digitizing, stitch editing, and embroidery simulation.
Role of Software in Embroidery Digitizing
Digitizing software performs several technical functions that control how embroidery machines stitch the design.
Key software functions include:
| Function | Description |
|---|---|
| Stitch Generation | Converts artwork shapes into embroidery stitches |
| Path Optimization | Defines the most efficient stitching sequence |
| Stitch Density Control | Adjusts stitch spacing for fabric stability |
| Design Simulation | Shows how the design will stitch on fabric |
| File Export | Converts the design into embroidery machine file formats |
These features allow digitizers to control stitch accuracy, reduce thread breaks, and ensure consistent embroidery production.
Embroidery Machine File Formats
Embroidery machine file formats are digital stitch files that contain the instructions required for embroidery machines to stitch a design on fabric. These files store data such as stitch coordinates, stitch type, thread sequence, and needle movement.
During the embroidery digitizing process, the final design is exported from digitizing software into a machine-readable embroidery format. Each embroidery machine brand supports specific file formats.
Common Embroidery Machine File Formats
Different embroidery machines use different stitch file formats to read embroidery designs.
| File Format | Compatible Machine Brand |
|---|---|
| DST | Tajima embroidery machines |
| PES | Brother and Babylock machines |
| EXP | Melco embroidery machines |
| JEF | Janome embroidery machines |
| VP3 | Husqvarna Viking machines |
Among these formats, DST (Data Stitch Tajima) is one of the most widely used commercial embroidery formats because it is compatible with many industrial embroidery machines.
Why Embroidery File Formats Matter
Embroidery file formats determine whether an embroidery machine can read and stitch a design correctly. If the wrong format is used, the machine cannot interpret the stitch instructions.
Important reasons file formats matter include:
- Machine compatibility: Each embroidery machine requires a specific file format
- Stitch accuracy: Correct formats preserve stitch coordinates and sequence
- Production efficiency: Proper file formatting reduces machine errors
- Thread sequence control: File data ensures correct color order during stitching
Digitizers therefore export embroidery designs in the correct machine format to ensure smooth embroidery production and consistent stitching results.
Materials and Components Used in Embroidery Digitizing
Materials and components used in embroidery digitizing determine how the embroidery design behaves during machine stitching. Fabric type, thread material, stabilizers, and needles influence stitch density, stitch direction, and overall embroidery quality.
Digitizers must consider these materials when creating stitch files because different materials respond differently to embroidery stitches.
Fabric Types Used in Machine Embroidery
Fabric type affects stitch density, pull compensation, and underlay structure during embroidery digitizing. Each fabric has unique texture, thickness, and stretch properties.
Common fabrics used in embroidery include:
- Cotton: Stable fabric commonly used for shirts and uniforms
- Polyester: Durable fabric used in sportswear and promotional apparel
- Denim: Thick fabric used for jackets and workwear embroidery
- Leather: Heavy material used for patches and luxury products
- Twill: Common base fabric for embroidered patches
Digitizers adjust stitch density and stitch direction based on fabric thickness and stability.
Thread Types Used in Embroidery
Embroidery thread creates the visible stitched design on fabric. Different thread types produce different textures, durability levels, and visual effects.
Common embroidery thread types include:
- Polyester thread: Strong and colorfast thread used for commercial embroidery
- Rayon thread: Smooth and shiny thread used for decorative embroidery
- Metallic thread: Decorative thread used for special embroidery effects
Thread selection affects stitch tension, color appearance, and design durability.
Stabilizers and Needles
Stabilizers and needles support embroidery stitching by controlling fabric movement and thread penetration.
Important embroidery components include:
- Stabilizer: Material placed beneath fabric to prevent distortion during stitching
- Embroidery needle: Specialized needle designed for machine embroidery
- Bobbin thread: Thread used in the lower part of the embroidery machine
Proper material selection ensures the digitized embroidery design stitches smoothly and maintains consistent quality across different fabrics.
Benefits of Professional Embroidery Digitizing
Professional embroidery digitizing ensures that embroidery designs stitch accurately, efficiently, and consistently on different fabrics and embroidery machines. A well-digitized design controls stitch structure, thread sequence, and machine movement to produce clean and durable embroidery results.
Professional digitizing improves embroidery production quality and reduces machine errors during stitching.
Precision Stitch Mapping
Professional digitizing creates precise stitch mapping that defines how each part of the design should be stitched. The digitizer assigns appropriate stitch types, stitch direction, and stitch density based on the design structure.
Key advantages include:
- Accurate reproduction of artwork
- Balanced stitch coverage
- Clear lettering and shapes
Precise stitch mapping ensures the embroidery machine follows an optimized stitching path.
Efficient Machine Production
Well-digitized embroidery files improve machine efficiency during embroidery production. Efficient stitch paths reduce unnecessary machine movement and minimize thread trims.
Production benefits include:
- Faster embroidery stitching
- Reduced thread breaks
- Optimized needle movement
- Consistent design output
Efficient digitizing helps embroidery businesses maintain stable production workflows.
Design Quality Control
Professional digitizing improves embroidery design quality by controlling stitch parameters and thread transitions. Proper underlay, stitch density, and stitch direction prevent embroidery defects.
Quality improvements include:
- Smooth stitch surfaces
- Reduced fabric puckering
- Proper thread layering
- Consistent stitch tension
These factors ensure the final embroidery design maintains professional appearance and durability.
Fabric Compatibility
Professional digitizing adjusts stitch settings according to fabric behavior and material properties. Different fabrics require different digitizing parameters to maintain embroidery stability.
Digitizers adjust:
- Stitch density
- Underlay structure
- Pull compensation
- Stitch length
These adjustments ensure embroidery designs stitch correctly on cotton, polyester, denim, and other textile materials.
Professional embroidery digitizing therefore plays a critical role in achieving high-quality embroidery production and maintaining consistent embroidery results across different materials and machines.
Industry Applications of Embroidery Digitizing
Embroidery digitizing is used across multiple industries to convert logos, text, and graphics into machine embroidery designs for branding, identification, and product decoration. Businesses rely on digitized embroidery files to produce consistent embroidered designs on apparel, accessories, and promotional products.
Different industries apply embroidery digitizing for different functional and branding purposes.
Apparel Industry
The apparel industry uses embroidery digitizing to produce branded and decorative embroidery on clothing. Digitized embroidery designs allow manufacturers to stitch logos and graphics directly onto garments.
Common embroidered apparel products include:
- Polo shirts
- T-shirts
- Jackets
- Hoodies
- Workwear uniforms
Embroidery digitizing ensures logos and designs remain consistent across large garment production batches.
Corporate Branding
Companies use embroidery digitizing to produce embroidered logos for brand identity and professional uniforms. Digitized logo files allow embroidery machines to reproduce the exact brand design on apparel.
Common corporate embroidery applications include:
- Staff uniforms
- Corporate shirts
- Promotional apparel
- Event merchandise
Embroidery provides a durable and professional branding method for businesses.
Military and Security
Military and security organizations use embroidery digitizing to produce identification patches and rank insignia. These embroidered elements help display ranks, unit names, and service identification.
Examples include:
- Military rank patches
- Unit insignia patches
- Police department patches
- Security badges
Digitized embroidery files ensure these patches maintain consistent design structure and durability.
Promotional Products
Embroidery digitizing is widely used in promotional product manufacturing to decorate branded merchandise. Businesses add embroidered logos to accessories to increase brand visibility.
Common embroidered promotional products include:
- Caps and hats
- Backpacks and bags
- Towels
- Sports accessories
These applications demonstrate how embroidery digitizing supports branding, manufacturing, and product customization across multiple industries.
Cost Factors in Embroidery Digitizing
Embroidery digitizing cost depends on design complexity, stitch count, design size, and the number of thread colors used in the embroidery design. These factors determine the amount of digitizing work required to convert artwork into a machine embroidery file.
Professional digitizers analyze the design attributes before estimating the digitizing cost.
Design Complexity
Design complexity is one of the main factors that influence embroidery digitizing pricing. Complex designs require more time to define stitch paths, stitch types, and object sequencing.
Complexity depends on:
- Number of design elements
- Fine details in artwork
- Small text or intricate shapes
- Multiple embroidery objects
More complex artwork requires additional digitizing adjustments and testing.
Stitch Count
Stitch count represents the total number of stitches required to produce the embroidery design. Designs with higher stitch counts take longer to digitize and stitch.
Examples of stitch count ranges:
- Small logos: 3,000 – 5,000 stitches
- Medium designs: 6,000 – 12,000 stitches
- Large embroidery designs: 15,000+ stitches
Higher stitch counts increase both digitizing complexity and embroidery production time.
Design Size
Design size affects the total stitch area and stitch density required for embroidery. Larger embroidery designs require more stitch coverage and additional digitizing adjustments.
Common embroidery design sizes include:
- Chest logos
- Cap logos
- Jacket back designs
- Large patch designs
As design size increases, the digitizer must optimize stitch density and stitch direction to maintain design stability.
Color Changes
Thread color changes influence embroidery digitizing workflow and machine sequencing. Each color requires a separate stitching section and thread change during embroidery production.
Factors affecting color changes include:
- Number of thread colors
- Stitch order planning
- Thread sequence optimization
Designs with multiple colors require additional digitizing planning to maintain efficient stitching order.
These factors collectively determine the overall cost and complexity of embroidery digitizing services.
Common Embroidery Digitizing Mistakes
Common embroidery digitizing mistakes occur when stitch parameters, fabric behavior, and design structure are not properly optimized during the digitizing process. These mistakes can cause embroidery defects such as thread breaks, fabric puckering, and distorted designs.
Avoiding these errors ensures the embroidery machine produces clean, stable, and consistent embroidery results.
Incorrect Stitch Density
Incorrect stitch density is a frequent digitizing mistake that affects embroidery quality and fabric stability. When stitch density is too high, stitches become overcrowded and cause thread tension issues. When density is too low, the design may appear incomplete or uneven.
Problems caused by incorrect stitch density include:
- Thread breakage
- Fabric puckering
- Uneven design coverage
- Poor stitch appearance
Digitizers adjust stitch density according to fabric type and design size to maintain balanced stitch coverage.
Poor Underlay Setup
Underlay stitches create the foundation that supports the top embroidery stitches. If underlay settings are incorrect, the design may shift or lose its structure during embroidery.
Issues caused by poor underlay setup include:
- Loose embroidery stitches
- Distorted shapes
- Poor thread coverage
- Uneven stitch surfaces
Proper underlay selection improves design stability and enhances final stitch quality.
Wrong Stitch Direction
Stitch direction controls the angle and visual texture of embroidery stitches. Incorrect stitch direction can cause gaps, uneven stitch patterns, or distorted design elements.
Common problems include:
- Irregular thread flow
- Visible stitch gaps
- Uneven lettering
- Misaligned design elements
Digitizers carefully plan stitch direction to maintain design clarity and consistent stitch texture.
Ignoring Fabric Behavior
Fabric behavior plays a critical role in embroidery digitizing because different fabrics respond differently to stitching tension. Ignoring fabric properties may cause embroidery distortion.
Fabric-related issues include:
- Stretch distortion on knit fabrics
- Stitch sinking on thick fabrics
- Fabric puckering on lightweight materials
Digitizers apply pull compensation, correct stitch density, and proper underlay to adapt the design for specific fabric types.
Avoiding these common digitizing mistakes helps maintain embroidery accuracy, production efficiency, and professional embroidery quality.
Best Practices for High-Quality Embroidery Digitizing
Best practices for embroidery digitizing focus on optimizing stitch parameters, artwork quality, and fabric compatibility to produce accurate and stable embroidery designs. Applying these practices improves stitch precision, reduces machine errors, and ensures consistent embroidery production.
Professional digitizers follow structured digitizing techniques to maintain embroidery quality across different designs and materials.
Use High-Resolution Artwork
High-resolution artwork improves the accuracy of embroidery digitizing by providing clear design details and clean edges. Low-quality images often contain blurred shapes or rough outlines that make digitizing difficult.
Recommended artwork formats include:
- AI (Adobe Illustrator)
- EPS vector files
- SVG vector graphics
- High-resolution PNG files
Clean artwork helps digitizers identify objects, shapes, and design elements more accurately during the digitizing process.
Optimize Stitch Density
Stitch density must be optimized to balance thread coverage and fabric stability. Excessive density can cause thread breaks and fabric puckering, while low density can result in weak embroidery coverage.
Digitizers adjust stitch density based on:
- Fabric thickness
- Design size
- Stitch type
- Thread type
Proper density ensures the embroidery design maintains a clean and professional appearance.
Select Correct Underlay
Underlay stitches create a support layer that stabilizes the embroidery design before top stitches are applied. Proper underlay improves stitch alignment and prevents fabric distortion.
Common underlay types include:
- Edge walk underlay
- Zigzag underlay
- Center run underlay
The correct underlay selection strengthens the embroidery structure and improves thread coverage.
Test Stitch the Design
Test stitching is an essential step that verifies embroidery quality before production begins. A sample embroidery run allows digitizers to evaluate stitch accuracy and adjust parameters if necessary.
Test stitching helps identify:
- Stitch density problems
- Thread tension issues
- Fabric distortion
- Stitch direction errors
By performing test stitches, digitizers ensure the embroidery design performs correctly on the selected fabric and embroidery machine.
Following these best practices helps produce high-quality embroidery digitizing files that maintain design accuracy, fabric stability, and efficient embroidery machine performance.
FAQs About Embroidery Digitizing
What is embroidery digitizing used for?
Embroidery digitizing is used to convert artwork, logos, or text into machine-readable stitch files that embroidery machines can stitch on fabric. Businesses and manufacturers use digitizing to produce embroidered logos on apparel, patches, caps, uniforms, and promotional products.
Digitized embroidery files allow machines to follow precise stitching instructions, ensuring consistent design reproduction during embroidery production.
How does embroidery digitizing work?
Embroidery digitizing works by translating a design into stitch instructions such as stitch type, stitch direction, stitch density, and needle path. A digitizer uses specialized software to map stitches over the artwork and create a machine embroidery file.
The embroidery machine reads this stitch file and stitches the design on fabric according to the programmed instructions.
What software is used for embroidery digitizing?
Embroidery digitizing software is used to create and edit machine embroidery designs. These programs convert artwork into structured stitch data.
Common embroidery digitizing software includes:
- Wilcom Embroidery Studio
- Hatch Embroidery Software
- Pulse DG Software
- Tajima DG/ML
- Brother PE-Design
These tools provide features for stitch editing, density control, and embroidery file export.
What file format do embroidery machines use?
Embroidery machines use stitch file formats that contain embroidery stitching instructions. Each machine brand supports specific embroidery formats.
Common embroidery file formats include:
- DST
- PES
- EXP
- JEF
- VP3
Digitizers export designs into the correct format so the embroidery machine can read the file and stitch the design properly.
How much does embroidery digitizing cost?
Embroidery digitizing cost usually depends on design complexity, stitch count, and design size. Simple logo digitizing may cost less, while detailed designs with many stitches require more digitizing work.
Typical pricing factors include:
- Number of design elements
- Total stitch count
- Design size
- Number of thread colors
Professional digitizing ensures accurate stitching and reduces embroidery production errors.
Can a logo be converted into an embroidery file?
Yes, a logo can be converted into an embroidery stitch file through the embroidery digitizing process. A digitizer imports the logo into digitizing software, assigns stitch types, and exports the design into a machine embroidery format.
The resulting stitch file allows embroidery machines to reproduce the logo using thread stitches on fabric.
How long does embroidery digitizing take?
Embroidery digitizing typically takes between 1 to 24 hours depending on design complexity and stitch detail. Simple logos can be digitized quickly, while complex designs require additional stitch planning and testing.
Production workflows often include test stitching to ensure the digitized file produces accurate embroidery results.
Conclusion
Embroidery digitizing is the technical process that converts artwork into machine-readable embroidery stitch files. The process defines stitch types, stitch density, stitch direction, and machine path so embroidery machines can reproduce designs accurately on fabric.
Through specialized digitizing software, designs are transformed into structured embroidery files that control thread movement and stitch formation. Proper digitizing ensures clean embroidery results, stable fabric stitching, and efficient machine production.
Because embroidery machines rely entirely on digitized stitch instructions, professional embroidery digitizing plays a critical role in producing high-quality embroidered logos, patches, apparel designs, and promotional products.